Manual
User Guide
Browse every section of your casasmooth system. Use the search or click a section to expand it.
The documentation covers all available features. Some may not be accessible due to required devices not being installed or plans and services not being activated. You can extend casasmooth at any time.
No sections found.
01
Introduction
casasmooth is a comprehensive home automation platform that brings together lighting, heating, security, energy monitoring, air quality, electric vehicle charging, appliances, media, weather, and much more into a single, coherent interface. Every area of your home can be configured, automated, and monitored from the same set of dashboards, whether you are sitting on the sofa, standing in the kitchen, or away from home entirely.
Important: this guide describes the full functional scope of casasmooth. Not every capability described here is necessarily active on every installation. What you see depends on which devices are physically installed, which dashboards have been enabled, and which service subscriptions are active. Where capabilities are not yet present, casasmooth can provide recommendations directly inside the interface to help you understand what could be added or enabled to improve your experience. Those recommendations appear as dedicated cards within the relevant dashboard or room section.
---
What casasmooth gives you
casasmooth organises your home into a set of dashboards, each focused on a specific domain of daily life. The main dashboard — simply called casasmooth — is your starting point and acts as the central hub from which you navigate to every other view. From there you can reach security, heating, air quality, energy, electric vehicle charging, health sensors, appliances, weather, media, an overview of all devices, a detailed monitor, system status, and administration tools.
Each dashboard is self-contained: you can open it, understand what is happening in that domain, adjust settings, and leave without needing to visit any other screen. At the same time, the dashboards are connected through shared global modes — such as away mode — that affect behaviour across the whole home simultaneously.
Capabilities that depend on your setup
Some dashboards and features only appear when the corresponding devices are present and the matching service is active. For example, the heating dashboard requires climate devices to be installed; the EV dashboard requires an electric vehicle integration; the cameras dashboard requires cameras to be connected. casasmooth will show you recommendations when a capability is available in principle but not yet active on your installation, so you always know what is possible and what would be needed to unlock it.
---
02
Day-to-Day Use — Practical Summary
Here is how casasmooth fits into a typical day:
Morning: The home dashboard shows you the weather, the current state of all rooms, and any recommendations. Heating has already adjusted to the dawn targets you configured. You check the air quality dashboard to confirm the bedroom air is fresh. You tap Away when you leave.
During the day: Away mode keeps heating at economy levels and security active. If you receive a notification, you open the security dashboard to review the event. You can check camera feeds from the cameras dashboard or the app.
Evening: You deactivate Away when you return. Lighting and heating shift to their dusk and night targets automatically. You recall a scene in the living room for a comfortable evening. You check the energy dashboard to see today's consumption.
End of month: You open the energy dashboard, select the past month, and review consumption and costs by category. You check the EV dashboard to see total charging costs across home and other locations. You open the administration dashboard to update energy costs if your tariff has changed.
Maintenance: Once a month you open the system dashboard to check battery levels and device updates. You review the monitor dashboard if you notice any unexpected behaviour in a room.
casasmooth is designed so that once your automations are configured, daily use requires very little interaction — the home manages itself according to your preferences, and you only need to intervene when you want something different from the norm.
casasmooth App
The casasmooth app gives you access to your home's major functions from a mobile device. When you open the app dashboard from the sidebar, it loads the app interface directly within the casasmooth environment. A button at the top lets you open the app in a new window if you prefer a full-screen experience.
The app provides access to the main home functions in a format optimised for mobile use. When the Enhanced View service is active, the app can include an interactive floor-plan style experience — a visual representation of your home where you can tap rooms to control them directly. This makes it particularly intuitive to use on a phone or tablet, since you navigate by the layout of your home rather than by a list of rooms.
The standard view service provides mobile app access focused on the home panel. The enhanced view service adds energy, security, and the interactive floor-plan panels to the mobile experience.
03
Dashboard Structure
Panels and cards
Each dashboard is divided into sections. A section groups related controls and information under a heading. Within a section you will find cards, which are the individual interactive elements — tiles you can tap to toggle a setting, sliders for adjusting values, status displays showing current readings, scene buttons, quick action buttons, and informational text.
Settings panels are collapsible: they only appear when you open them via the Settings badge or a Config button. This keeps the daily-use view clean while still giving you access to deep configuration when you need it.
Visibility toggles
Many sections and rooms include a Hide button. When you tap it, that room or section disappears from the main view. This is useful for keeping the dashboard focused on the areas you actually use every day. You can always make a hidden section visible again through the Settings panel.
Config and Help buttons
Each room section on the home dashboard has a Config button that opens the full settings panel for that room, and a Help button that opens contextual guidance. These are the two most important entry points for customising how a room behaves.
Recommendations
When casasmooth detects that a capability could be improved — for example, a room has no motion sensor but could benefit from presence-based lighting — it displays a recommendation card directly inside the relevant section. These cards are informational: they explain what could be added or changed, but they do not activate anything automatically.
---
05
Home Dashboard (casasmooth)
The home dashboard is the heart of your daily interaction with casasmooth. It is where you see the current state of every room, control lighting and other devices, launch scenes, and configure how each area of your home behaves. Because it covers the entire home, this dashboard is significantly richer than the others and deserves careful exploration.
What you see when you open it
The home dashboard opens on a view that shows a weather summary, an energy overview, and then a sequence of room sections — one for each area that is currently set to visible. The order follows the layout of your home, showing rooms such as: hallway, kitchen, living room, bedroom, garden, and so on. Each room section shows the current state of that room's devices and provides quick controls.
At the very top, the badge row gives you instant access to Settings, Away mode, Play mode, the help page, and recommendations.
Top badges on the home dashboard
Settings opens the home settings panel, which is the master control for everything that appears on this dashboard. You would open it when you want to show or hide a room, enable a new feature family, or dive into a room's automation configuration.
Away toggles the whole-home away mode. When you activate it before leaving for a holiday, casasmooth can shift heating to economy levels, keep security active, and suppress certain automations that only make sense when someone is home.
Play toggles playback mode, which can influence how automations behave when media is playing in the home.
The help badge gives you instant access to documentation for the home dashboard specifically.
Recommendations shows or hides the improvement suggestions that casasmooth has generated based on your current setup.
The home settings panel
Tapping the Settings badge reveals the home settings panel. This panel is the most powerful configuration surface in casasmooth. It is organised into several families of controls.
Room visibility controls — a grid of toggle tiles, one per area, lets you show or hide each room on the main dashboard. If you never use the workshop or the parking area, you can hide them so the dashboard stays focused on the rooms you care about. The areas you can control depend on your installation configuration, for example: hallway, kitchen, living room, bedroom, cellar, garden, etc.
Display controls — a separate group of toggles lets you control which types of information appear within room sections. You can show or hide thumbnails, titles, subtitles, lighting controls, extended lights, switches, energy switches, scenes, automations, locks, sirens, batteries, sensors, HVAC controls, shutters, security panels, cameras, car information, storage, cooking, cleaning, vacuums, media players, televisions, and the settings panel itself. This means you can create a very focused daily view that shows only what matters to you, while keeping everything else accessible through the settings panel when needed.
Domain controls — a further group of toggles lets you enable or disable entire feature families across the dashboard: schedules, lighting, heating, shutters, weather, security, and cameras. Disabling a domain hides all related controls from the main view without deleting any configuration.
Quick actions — three quick action buttons are available at the top of the home view: save a casasmooth backup, view casasmooth services, and update casasmooth. These are administrative shortcuts that you would use occasionally rather than daily.
Room sections — how they work
Each room on the home dashboard follows the same pattern. Understanding one room means you understand all of them.
At the top of each room section is a heading with the room name, a Hide button to remove it from view, a Config button to open that room's settings, and two Help buttons (one for the local help page, one for the online manual). Below the heading, casasmooth may show a recommendation card if there is something worth improving for that room.
The room section then shows sub-sections for each domain that is active in that room: schedule, lighting, heating, shutters, weather, security, and cameras — only the ones that apply. Each sub-section has its own set of controls.
Schedule sub-section
Every room has a schedule sub-section with a Schedules toggle. This controls whether the room follows its configured time-based automation. When enabled, the room's lighting, heating, or shutter behaviour will follow the rules you have set for each time period. When disabled, the room stays under manual control. You would disable the schedule temporarily if you want to override automation for an evening without changing the underlying configuration.
Lighting sub-section
Rooms with lighting controls show a lighting sub-section. This is where you configure how lights behave automatically. The controls are organised into several panels that you open one at a time.
Various parameters — general lighting settings for the room that do not fit into the other categories.
Standard lighting automation — this panel lets you configure basic time-based lighting. casasmooth divides the day into four periods: dawn, day, dusk, and night. For each period you can enable or disable the automation and set a target brightness level as a percentage. For example, in a kitchen you might set dawn to 40%, day to 80%, dusk to 60%, and night to 20%. When the automation is active, the lights will turn on at the configured brightness as each period begins, and turn off when the period ends if no one is present.
Brightness percentages — a dedicated panel for fine-tuning the brightness values for each period, separate from the on/off enable controls.
Advanced lighting automation — this panel gives you access to presence-based and illuminance-based lighting. When a motion sensor is present in the room, you can configure the lights to turn on only when someone is detected, and to turn off after a configurable delay once the room is empty. You can also set illuminance thresholds in lux: the lights will only turn on automatically if the room is darker than the threshold, preventing unnecessary lighting on bright days. Advanced automation also supports colour temperature and RGB colour settings per period, so your living room can shift from cool white during the day to warm amber in the evening automatically. When both standard and advanced lighting automation are configured for the same room, the advanced automation takes precedence. Treat standard lighting as the baseline fallback and advanced lighting as the active rule set.
Colours — a panel for setting colour temperature or RGB colour per period for rooms with colour-capable lights. Colour temperature is measured in Kelvin (K): 2 700 K is a warm golden light like a traditional bulb, 4 000 K is neutral white, and 6 500 K is cool light close to overcast daylight.
Illuminance thresholds — a panel for setting the lux level below which automatic lighting should activate, per period. For reference: 1 lux is roughly the brightness of a single candle at 1 metre; a comfortable reading desk reaches about 300–500 lux; direct summer sunlight exceeds 10 000 lux.
Delays — a panel for setting how many minutes the lights should stay on after the last detected presence, per period. For a staircase you might set a short delay of two minutes; for a living room you might prefer fifteen minutes.
Exceptions — a panel for configuring conditions under which the normal lighting automation should not apply.
Scenes — a panel for saving and restoring lighting scenes. You can save up to four scenes per room and restore any of them with a single tap. This is useful for creating a "movie night" scene in the living room or a "morning routine" scene in the bathroom that you can recall instantly without adjusting individual lights.
Quick actions — some rooms offer quick action buttons directly in the lighting sub-section. For example, the kitchen, living room, dining area, office, exterior, staircase, garage, attic, and others offer buttons to set standard lighting immediately to 100% or to 50%. The exterior and cellar also offer a button to toggle the standard switches. These quick actions let you override the current automation state instantly without opening any settings panel.
Heating sub-section
Rooms with heating or climate control show a heating sub-section. The controls here let you configure how the room's temperature is managed automatically.
Heating automation toggle — this toggle enables or disables automatic temperature control for the room. When enabled, casasmooth will adjust the thermostat or radiator according to the configured targets. When disabled, you control the temperature manually.
Temperature targets — a panel for setting the target heating temperature for each of the four daily periods: dawn, day, dusk, and night. For a bathroom you might set a higher temperature at dawn (when people shower) and a lower temperature during the day when the room is unused. For a living room you might set a comfortable temperature during the day and dusk, and a lower temperature at night.
Cooling targets — for rooms that support cooling (such as the living room and attic), a separate panel lets you set cooling temperature targets per period.
Advanced heating (presence-based) — when a motion sensor is present, this panel lets you configure presence-based heating. You can enable presence detection per period and set a delay: the heating will reduce to an economy level after the room has been empty for the configured number of minutes, and return to the comfort target when someone enters. When both standard and advanced heating are configured, the advanced logic takes precedence.
Heating hysteresis — a panel for setting the temperature tolerance band. This prevents the heating from switching on and off too frequently when the temperature is close to the target.
Shutter sub-section
Rooms with motorised shutters or blinds show a shutter sub-section. The office (bureau) is the most fully featured example, with both standard and advanced shutter automation, position and tilt controls, and light protection.
Shutter automation toggle — enables or disables automatic shutter control for the room.
Standard shutter automation — lets you configure a target position for each period. For example, shutters fully open at dawn, partially open during the day, partially closed at dusk, and fully closed at night.
Advanced shutter automation — provides per-shutter positioning for rooms with up to four individual shutters, with enhanced period control. When advanced shutter automation is enabled, it takes precedence over the standard schedule.
Position panel — lets you set the exact open/close position (as a percentage) for each period, with configurable minimum and maximum position limits.
Tilt panel — for shutters that support tilt (louvre angle), lets you set the tilt angle per period.
Light protection — lets you set a maximum illuminance level above which the shutters will close automatically to protect the room from excessive sunlight. This is particularly useful in a south-facing office where glare can make screen work uncomfortable.
Security sub-section
Rooms that participate in the security system show a security sub-section. This is where you configure how each room contributes to the overall alarm logic.
Alarm system toggle — enables or disables this room's participation in the security system. When enabled, sensors in this room will contribute to alarm events.
Use sensors — when enabled, motion sensors and other detectors in the room are monitored as part of the security logic.
Use lights — when enabled, lights in the room can be used as deterrents (for example, flashing when an alarm is triggered).
Priority weight — lets you assign a relative importance to this room's sensors. A room with a higher weight contributes more strongly to the overall alert score.
Camera notification time — for rooms that have cameras (entrance and exterior in this installation), you can configure during which periods camera-based alerts are allowed. You can enable or disable notifications for each of the four daily periods independently.
Camera sub-section
Rooms with cameras show a camera sub-section where you can configure which cameras are active and how they contribute to notifications. The entrance and exterior areas each have camera notification time controls covering all four daily periods.
Room-by-room overview
The home dashboard covers 26 areas. Here is a summary of which domains are active in each, so you know where to find the relevant controls.
Rooms with lighting and security: exterior, kitchen, pantry, cellar, staircase, garage, dining area, workshop, and others. These rooms have both lighting automation panels and security participation settings.
Rooms with lighting, heating, and security: living room, attic, bathroom, office (which also has shutters). These are the most fully featured rooms, with temperature targets, presence-based heating, and full lighting configuration.
Rooms with lighting only (schedule and timing): decoration, parking, road, IT area, briefcase, car, energy area. These simpler areas have schedule controls and may have basic lighting configuration.
Rooms with heating only (no lighting automation): greenhouse (serre), which has heating targets and a hysteresis setting but no automated lighting.
Rooms with cameras: entrance and exterior. These two areas have camera notification period controls in addition to their security settings.
Practical scenarios — home dashboard
Morning routine: You wake up and open the home dashboard. The weather summary at the top tells you it will be cold and rainy. You see that the living room heating is already at the dawn temperature you configured. You tap the dining area's quick action to set the lights to 100% while you have breakfast. Before leaving, you tap the Away badge to activate away mode, which reduces heating across the home and keeps security active.
Preparing for an evening at home: You return home and tap Away again to deactivate away mode. You open the living room section, tap the scene restore button for your "evening" scene, and the lights shift to warm amber at 40% brightness automatically. The heating is already at the dusk target you configured. You do not need to touch anything else.
Configuring the office for working from home: You open the office Config panel. In the lighting section, you set the advanced automation to turn lights on when motion is detected and off after ten minutes of no presence. You set the illuminance threshold so lights only activate when it is darker than 200 lux — meaning on bright days the lights stay off even if you are present. You also set the shutters to close to 60% during the day to reduce glare, with a maximum illuminance limit that closes them fully if sunlight becomes too intense.
---
06
Area and Room Configuration (casasmooth Areas)
The areas section of casasmooth provides a dedicated per-room view for each area of your home. Unlike the home dashboard — which shows all rooms together and is optimised for daily use — the areas views give you a focused, detailed interface for a single room at a time.
How area views are structured
Each area view follows the same layout. At the top, a badge row gives you access to Settings, news (Actualités), the current time, weather, extended weather, and recommendations. Below that, the view is divided into sections.
News section — shows current news or informational content relevant to the area.
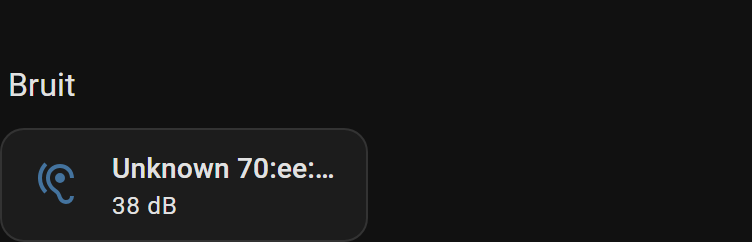
Real-time section — shows live sensor readings for the area: temperature, humidity, and other available measurements. This gives you an immediate picture of conditions in that room right now.
Weather section — shows weather data relevant to the area, which may include outdoor conditions for exterior-facing rooms.
Extended weather section — provides a more detailed weather view for the area.
Device control sections — depending on what is installed in the room, you will see sections for lighting, switches, locks, cameras, and other device types. Each section shows the current state of the devices and lets you control them directly.
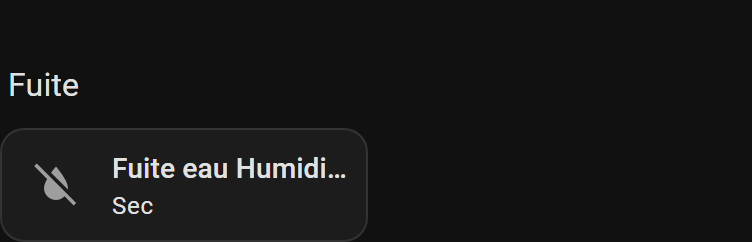
Binary sensors section — shows the state of contact sensors, motion sensors, and other binary devices in the room.
Other devices section — covers any additional devices that do not fit the main categories.
Area views available
The following areas each have their own dedicated view: entrance, exterior, kitchen, pantry, living room, dining area, attic, office, bathroom, workshop, briefcase, car, cellar, bedroom, shower, staircase, garage, parking, road, greenhouse, toilet, decoration, desk, energy area, IT area, and a system area.
Each view is tailored to the devices present in that room. For example, the exterior view has sections for lighting, switches, cameras, and sensors. The office view has sections for lighting, switches, and sensors. The bathroom view has sections for lighting and switches. Rooms with no devices beyond basic sensors have simpler views with fewer sections.
Practical scenarios — area views
Checking the living room in detail: You want to see exactly what sensors are active in the living room and what their current readings are. You navigate to the living room area view and see the real-time temperature, the state of all lights and switches, and the motion sensor status — all in one focused screen.
Controlling the exterior from a dedicated view: You are configuring the outdoor lighting and want to see all exterior devices together. You open the exterior area view and adjust the lighting and switches directly, with the real-time weather data visible alongside for context.
---
07
Security
The security dashboard gives you a clear, consolidated view of your home's protection status and lets you configure exactly how the alarm system behaves — which rooms contribute, how events are counted, when the system arms and disarms, and how you are notified.
Top badges
The security dashboard adds an Armed badge to the standard row. Tapping it arms or disarms the security system immediately. You can see at a glance whether the system is currently active without opening any panel. The Away badge is also present, since away mode and security are closely linked — activating away mode can influence how the security system behaves.
Security settings panel
Tapping the Settings badge on the security dashboard opens the security settings panel. This is where you configure the overall behaviour of the alarm system, separate from the per-room settings you configure on the home dashboard.
Scheduler
The security dashboard includes a Scheduler section. This lets you plan automatic arming and disarming windows — for example, arming the system every night at 23:00 and disarming it at 07:00, or arming it automatically on weekday mornings when everyone leaves for work. The scheduler means you do not need to remember to arm the system manually; casasmooth handles it according to the plan you set. You can review the planned windows, adjust the times, and enable or disable the scheduler without affecting the manual arm/disarm control.
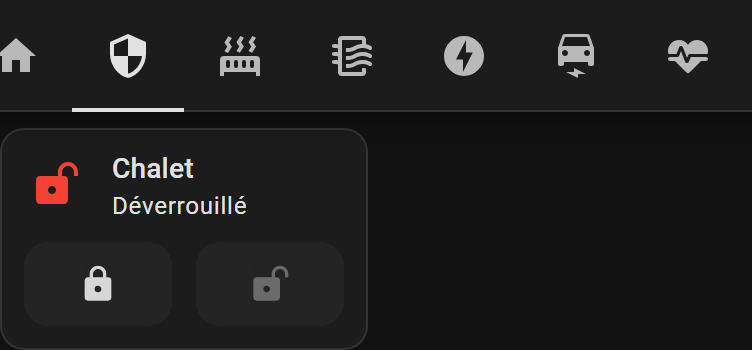
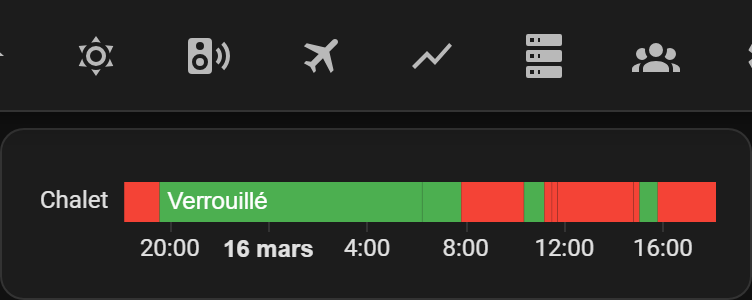
Locks
The security dashboard shows a Locks section with the current state of all connected locks in the home. You can see at a glance which locks are engaged and which are open. A lock history section shows recent lock and unlock events, so you can check whether the front door was locked last night or see when it was last opened.
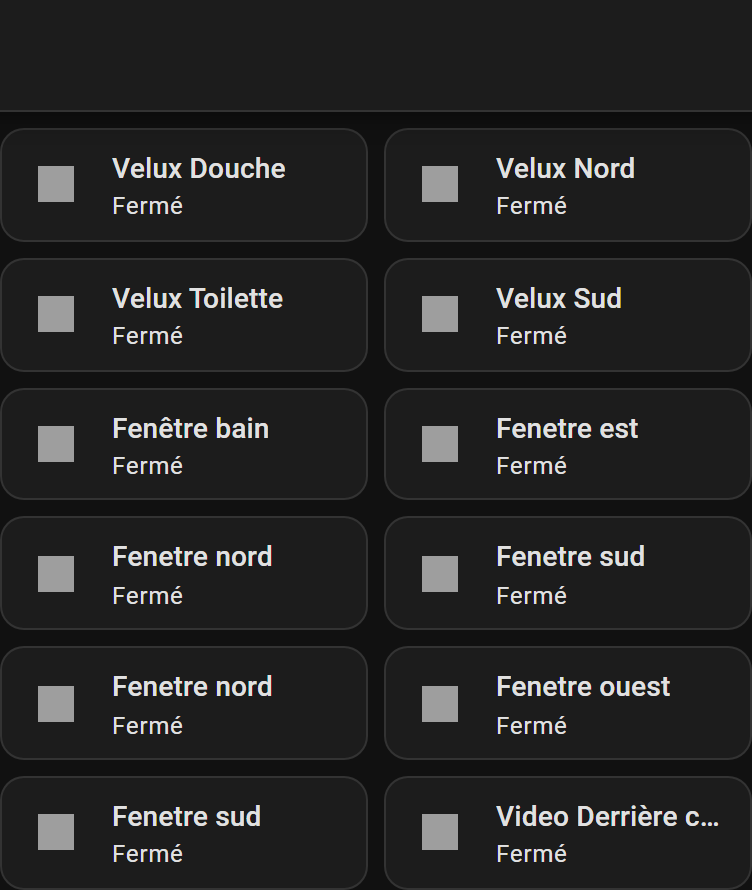
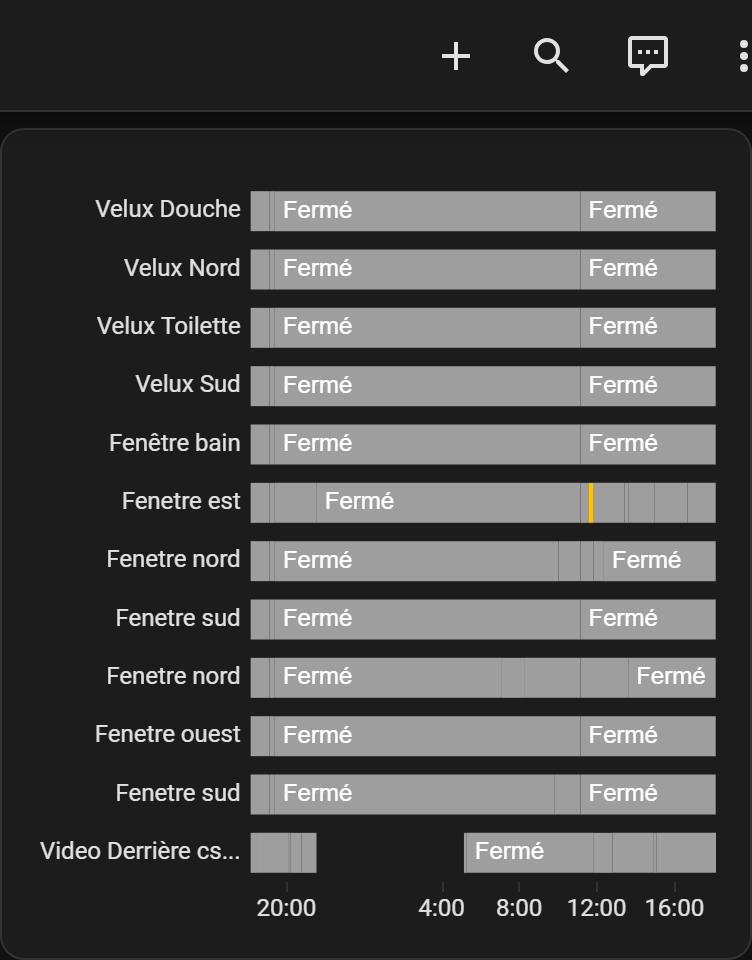
Openings
An Openings section shows the current state of doors and windows that have contact sensors. You can see which openings are currently open or closed. An opening history section records recent events, giving you a log of when doors and windows were opened or closed — useful for checking whether a window was left open while you were away.
Alert logic
The security system counts events from sensors across the rooms that are participating in the alarm. Each room's sensors contribute to an overall alert score, weighted by the priority you have assigned to that room in the home dashboard settings. When the score crosses a threshold, the system can trigger an alert. SMS and other notification channels can be configured to send you an alert when this happens, so you are informed even when you are away from home.
Practical scenarios — security
Leaving for a weekend away: Before you leave, you arm the system using the Armed badge. You check the openings section to confirm all windows are closed. You verify that the scheduler is set to keep the system armed until your return. You activate away mode so the system knows the home is unoccupied.
Reviewing a night-time event: You receive a notification that an alert was triggered overnight. You open the security dashboard and check the lock history and opening history to see what happened and when. You can see which sensor triggered the event and decide whether any action is needed.
---
08
Heating
The heating dashboard gives you a complete view of climate control across your home, letting you monitor temperatures in every room and adjust how heating and cooling behave throughout the day.
Top badges
The heating dashboard shows Settings, Away, the help badge, and recommendations. Away mode is relevant here because activating it can shift heating across all rooms to economy targets.
Scheduler
The heating dashboard includes a Scheduler section, where you can review and adjust the time-based heating plan for the whole home. This complements the per-room temperature settings you configure on the home dashboard.
HVAC
The HVAC section shows the current state of all climate control units — thermostats, heat pumps, or other HVAC devices — across the home. You can see the current temperature and target temperature for each unit, and adjust them directly. An HVAC history section records how temperatures have changed over time, so you can check whether a room reached its target or identify periods when heating was running unexpectedly.
Radiators
The Radiators section shows the state of individual radiator valves or electric radiators. A radiator history section records their activity over time.
Temperature overview
A Temperature section provides a consolidated view of temperature readings across all rooms, so you can see at a glance which rooms are warm, which are cool, and whether any room is significantly off its target.
Per-room heating configuration
The detailed per-room heating settings — temperature targets per period, presence-based heating, delays, cooling targets, and hysteresis — are configured from the home dashboard's room sections, as described above. The heating dashboard gives you the monitoring and scheduling overview; the home dashboard gives you the per-room configuration.
Practical scenarios — heating
Cold morning: You open the heating dashboard and see that the bathroom reached its dawn temperature target on time. The living room is slightly below target because the heating took longer than expected. You adjust the dawn target for the living room slightly upward so it reaches comfort temperature earlier tomorrow.
Going on holiday: You activate away mode before leaving. The heating across all rooms shifts to economy targets. When you return, you deactivate away mode and the heating returns to normal schedules.
---
09
Air Quality and Air Conditioning
The air dashboard lets you monitor air quality conditions throughout your home and, where air conditioning or ventilation devices are present, control them. Good air quality directly affects how comfortable and healthy your home feels, and this dashboard makes it easy to see what is happening in each room.
Top badges
The air dashboard shows Settings, the help badge, and recommendations. There is no Away badge on this dashboard.
Per-room air quality
The air dashboard is organised by room, following the same area structure as the home dashboard. For each room, casasmooth displays the available air quality readings — which may include temperature, humidity, CO₂, and other measurements depending on the sensors installed. The data is shown in a clear, readable format so you can see at a glance which rooms have good air quality and which might need attention.
Settings panel
The air settings panel lets you configure which rooms and which types of data are shown. You can also access the configuration guide for air quality directly from this dashboard.
Practical scenarios — air quality
Stuffy living room: You notice the air quality reading for the living room is showing elevated CO₂. You open a window or activate ventilation to bring fresh air in. After a few minutes you check the dashboard again and see the reading has improved.
Monitoring overnight: Before going to bed, you check the bedroom air quality reading to make sure humidity and CO₂ are within comfortable ranges for sleeping.
---
10
Energy
The energy dashboard helps you understand where electricity is used in your home, how much it costs, and how your consumption is distributed over time. This is the dashboard you open at the end of the month to review your bills, or during the day to spot unexpected consumption.
Top badges
The energy dashboard shows Settings, Away, the help badge, and recommendations. Away mode is relevant because it can influence which consumers are active.
Energy overview
The Energy overview section gives you a high-level summary of current energy flows — consumption, production if applicable, and battery state if applicable. This is the first thing you see when you open the dashboard, giving you an immediate sense of what is happening right now.
Date selection
A Date selection control lets you choose the time period you want to analyse — today, yesterday, the past week, the past month, or a custom range. This is the key to using the energy dashboard for bill review: select the billing period and see exactly what was consumed.
Distribution
The Distribution section shows how energy is split across different sources and consumers. This lets you see, for example, what proportion of your consumption came from the grid versus solar production, or how consumption was distributed across different times of day.
Figures
The Figures section shows numerical totals for the selected period — total consumption in kilowatt-hours, total cost in your configured currency, and other key metrics.
Proportions
The Proportions section shows the relative share of consumption by category or consumer, helping you identify which parts of your home use the most energy.
Sources history
The Sources history section shows how energy sources have varied over time within the selected period, giving you a timeline view of consumption and production.
Consumer configuration
The energy dashboard includes detailed consumer configuration controls. For each consumer you can set activation and deactivation rules, cost parameters, and thresholds. This lets casasmooth calculate not just how much energy each consumer uses, but how much it costs — and when it makes sense to run it. You can configure the unit cost of electricity so that all cost figures are accurate for your tariff.
Practical scenarios — energy
End of month review: You open the energy dashboard and select the past month. You look at the figures section to see total consumption and cost. You check the proportions section to see which consumers accounted for the largest share. You notice that heating was the biggest contributor and decide to lower the night-time temperature target slightly next month.
Spotting unexpected consumption: You notice your energy bill is higher than usual. You open the energy dashboard, select the past week, and look at the distribution and sources history. You identify a period when consumption was unusually high and trace it to a device that was left running overnight.
---
11
Electric Vehicle Charging (EV)
The EV dashboard gives you a dedicated view of your electric vehicle's charging status, energy use, and costs. If you charge your car at home, at work, and at public stations, casasmooth can help you understand the total cost of each charging session and compare the cost of charging in different locations.
Top badges
The EV dashboard shows Settings, the help badge, and recommendations.
Vehicle state
The Vehicle state section shows the current status of your electric vehicle — charge level, connection status, and other available readings from the vehicle integration.
EV energy and costs
The EV energy and costs section shows how much energy has been used for charging and what it has cost. casasmooth can calculate the total charging cost based on where charging happened and the unit cost configured for each charging location. This matters because the cost per kilowatt-hour at home, at work, and at a public charging station can be very different. By tracking where each session happened and applying the correct unit cost, casasmooth gives you an accurate picture of your real charging expenses — not just the energy consumed, but what you actually paid for it.
EV detailed energy breakdown
The EV detailed energy breakdown section provides a more granular view of charging sessions, showing how energy was distributed across different charging locations or time periods.
Vehicle controls
Depending on the vehicle integration available, the EV dashboard may show safety, climate, and direct control sections for the vehicle. These let you check safety status, pre-condition the cabin temperature before a journey, and send commands to the vehicle.
Practical scenarios — EV
Comparing charging costs: At the end of the month you open the EV dashboard and look at the energy and costs section. You can see that charging at home cost significantly less per session than the public charging you used during a trip. This helps you plan future journeys to maximise home charging.
Pre-conditioning before a winter morning: You open the vehicle controls section and activate cabin pre-conditioning so the car is warm before you leave, without draining the battery during the drive.
---
12
Health Sensors
The health dashboard brings together readings from personal health devices that are integrated with casasmooth. This gives you a single place to review health-related data alongside your home environment data.
Top badges
The health dashboard shows Settings, the help badge, and recommendations.
Device readings
The health dashboard shows readings from connected health devices. The data shown depends entirely on which devices are integrated. The dashboard is organised by device, with each device's available readings displayed in a clear format.
Settings panel
The health settings panel lets you configure which devices and readings are shown, and access the configuration guide for health monitoring.
Practical scenarios — health
Morning check: You open the health dashboard to review overnight readings from a connected health device alongside the bedroom air quality data from the air dashboard, giving you a combined picture of your sleep environment and personal health metrics.
---
13
Appliances
The appliances dashboard gives you control and status information for smart appliances in your home, organised into three categories: storage, cooking, and cleaning.
Top badges
The appliances dashboard shows Settings, the help badge, and recommendations.
Storage
The Storing section covers appliances related to food and item storage — for example, a smart refrigerator or freezer if integrated.
Cooking
The Cooking section covers cooking appliances that are connected to casasmooth.
Cleaning
The Cleaning section covers cleaning appliances, including robot vacuums if present.
Each section shows the current state of the relevant appliances and provides direct controls where the device supports them.
Practical scenarios — appliances
Checking the dishwasher: You open the appliances dashboard and see that the dishwasher has finished its cycle. You can confirm this without going to the kitchen.
Starting the robot vacuum: You open the cleaning section and start the robot vacuum remotely before you arrive home, so the floors are clean when you get there.
---
14
Weather
The weather dashboard gives you a detailed view of current and forecast weather conditions, both for your immediate location and for a broader regional view. Understanding the weather helps you make better decisions about heating, shutters, and outdoor activities.
Top badges
The weather dashboard shows Settings, the help badge, and recommendations.
Real-time weather
The Real-time section shows current conditions — temperature, humidity, wind, and other available readings from your weather integration.
Weather history
The History section shows how conditions have changed over recent hours or days, so you can see trends rather than just the current snapshot.
Compact and summary views
The Compact and Summary sections provide condensed views of weather data, useful when you want a quick overview without the full detail.
European overview
The Europe overview section provides a broader regional weather picture, useful for planning travel or understanding weather patterns affecting your area.
Practical scenarios — weather
Planning shutter settings: You check the weather dashboard in the morning and see that a very sunny afternoon is forecast. You open the office shutter settings on the home dashboard and lower the maximum illuminance threshold so the shutters will close earlier to prevent glare.
Preparing for frost: You see that overnight temperatures will drop below zero. You check the heating dashboard to confirm that the greenhouse heating target for the night period is set high enough to protect plants.
---
15
Media
The media dashboard gives you control over media players in your home — speakers, streaming devices, and other audio or video equipment that is integrated with casasmooth.
Top badges
The media dashboard shows Settings, the help badge, and recommendations.
Media player controls
The media dashboard shows the available media players, organised by room. For each player you can see what is currently playing and control playback. The dining area speaker is one example of a media player that appears in this dashboard.
Practical scenarios — media
Setting the mood for dinner: You open the media dashboard and start music on the dining area speaker before sitting down to eat, without needing to use a separate app.
---
16
Overview and Cameras (Aperçu)
The overview dashboard gives you a bird's-eye view of all devices across the home, organised by device type rather than by room. This is the dashboard you open when you want to check the state of all lights, all switches, all shutters, or all motion sensors at once — for example, before leaving the house.
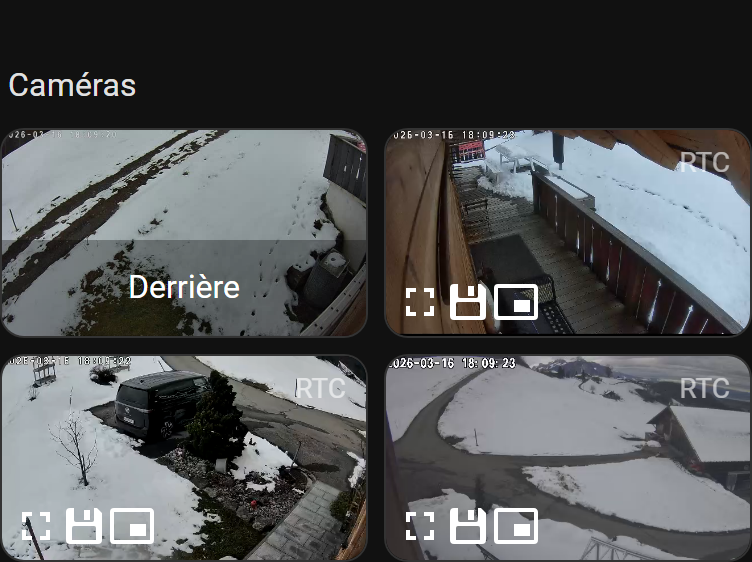
The cameras dashboard provides a dedicated full-screen view of your connected cameras. It is accessible directly from the sidebar and opens a single consolidated camera view that shows all camera feeds available on your installation.
This dashboard is separate from the camera controls embedded within individual room sections on the home dashboard. While the home dashboard lets you configure camera notification periods per room, the cameras dashboard is purely for viewing — it gives you the clearest possible picture of what your cameras are currently seeing.
Camera integration and the depth of camera features available depend on which camera service is active. The enhanced camera service adds advanced features beyond basic viewing.
Top badges
The overview dashboard shows Settings, the help badge, and recommendations.
Lighting overview
The Lighting section shows all lights across the home in a single list, with their current state. You can see at a glance which lights are on and which are off, and toggle any of them directly.
Switches
The Switches section shows all standard switches across the home.
Energy switches
The Energy switches section shows switches that are monitored for energy consumption.
Shutters
The Shutters section shows all motorised shutters and covers, with their current position.
Motion sensors
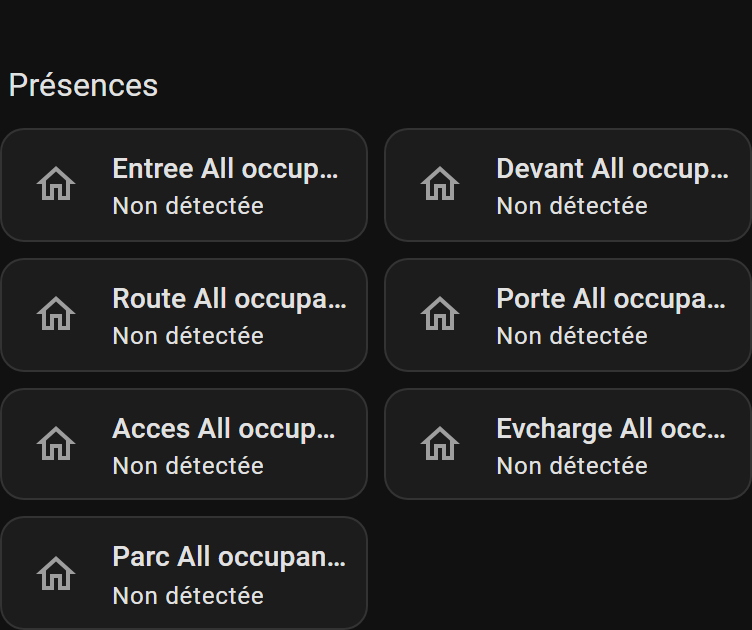
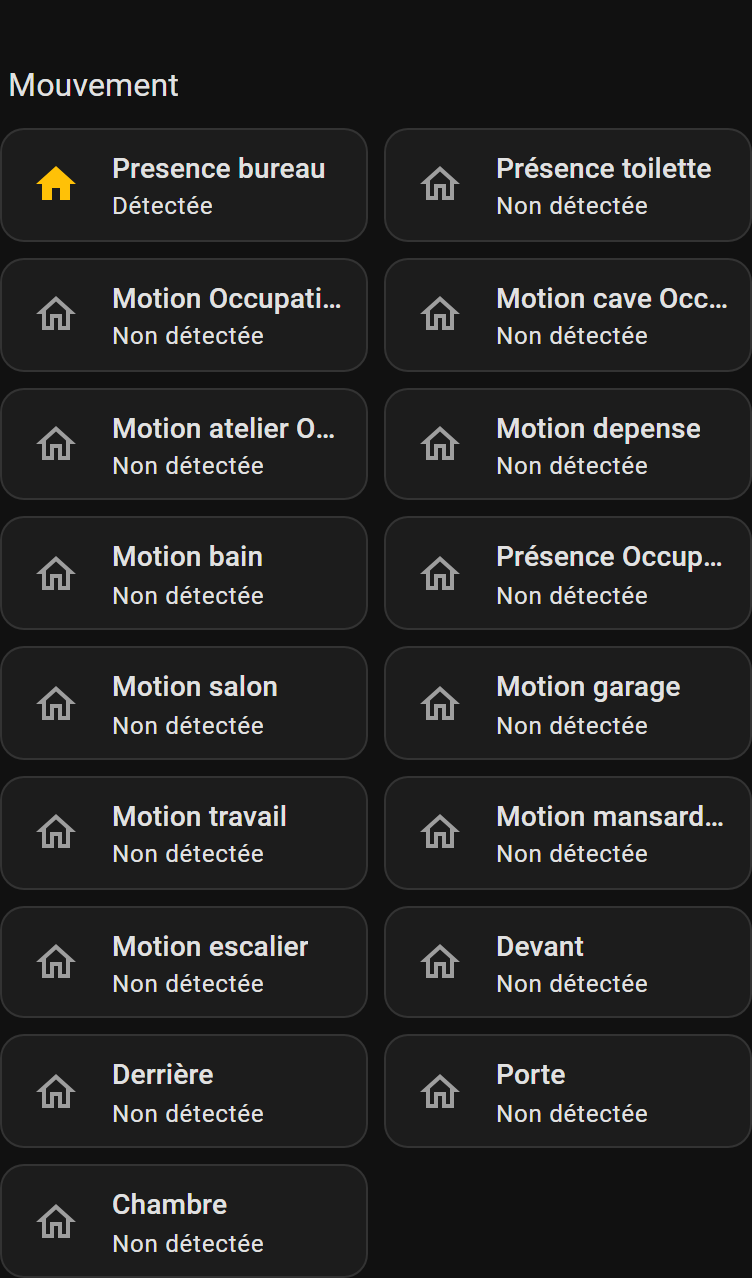
The Motion section shows all motion sensors, so you can see which areas are currently detecting presence.
Quick actions
The overview dashboard includes quick action buttons for common whole-home commands, letting you act on multiple devices at once.
Practical scenarios — overview
Leaving the house: Before you leave, you open the overview dashboard and check the lighting section. You see that a light in the cellar is still on. You tap it to turn it off without going downstairs. You also check the shutters section to confirm all shutters are in the correct position.
Security check before bed: You open the overview dashboard and check the motion section to confirm no unexpected movement is being detected. You check the lighting section to make sure all lights are off except the ones you want on.
---
Practical scenarios — cameras
Checking who is at the door: You hear the doorbell and open the cameras dashboard to see the entrance camera feed before deciding whether to answer.
Reviewing outdoor activity: Before going to bed, you open the cameras dashboard and glance at the exterior camera to confirm everything looks normal outside.
---
17
Monitor
The monitor dashboard is the most detailed diagnostic and historical view in casasmooth. It gives you access to the full history of readings and states for every device in every room, organised by area. This is where you go when you want to understand what happened in a specific room over a specific period, or when you are troubleshooting unexpected behaviour.
Top badges
The monitor dashboard shows Settings, the help badge, and recommendations.
Per-room monitoring
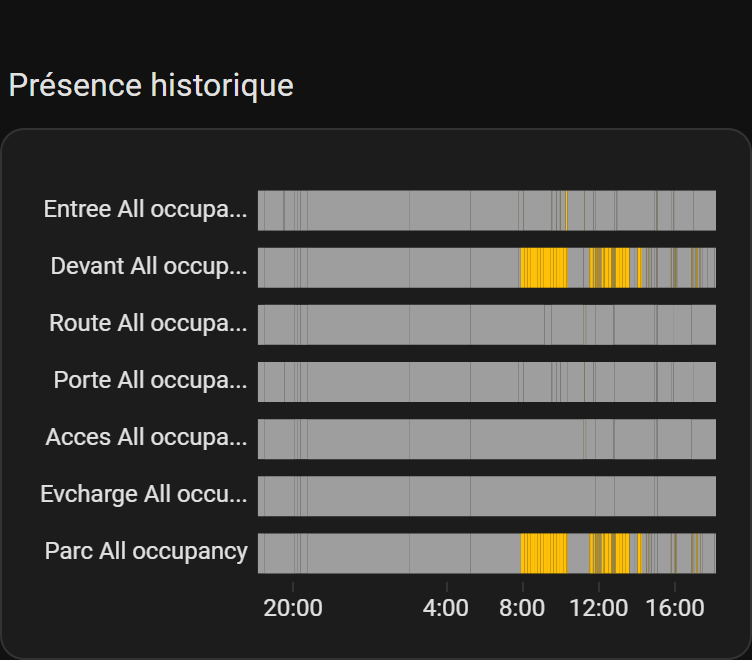
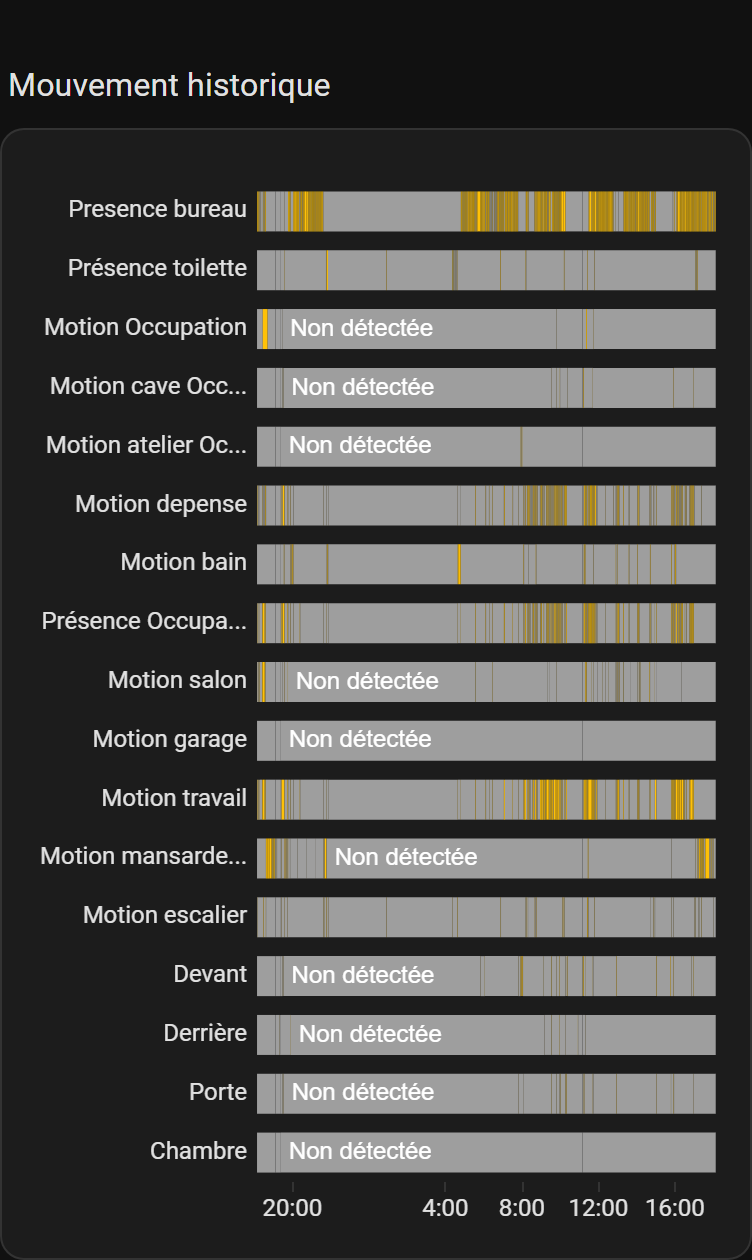
The monitor dashboard is organised by room, following the same area structure as the home dashboard. For each room, you can see detailed historical data for all devices — temperature readings over time, lighting state history, motion detection history, energy consumption, and more. The depth of data available depends on which devices are installed and which monitoring services are active.
Settings panel
The monitor settings panel lets you configure which rooms and which types of data are shown. With over 600 setting controls, this is the most configurable dashboard in casasmooth, reflecting the depth of monitoring available.
Practical scenarios — monitor
Investigating a heating anomaly: You notice your heating bill was higher than expected last month. You open the monitor dashboard, navigate to the living room, and review the HVAC history for the past month. You can see that the heating was running during periods when the room should have been empty, and trace this to a misconfigured presence delay.
Checking sensor history: A motion sensor in the staircase triggered an alert last night. You open the monitor dashboard, navigate to the staircase, and review the motion history to see exactly when and how often movement was detected.
---
18
System (Systèmes)
The system dashboard gives you a view of the technical health of your casasmooth installation — the software, hardware, and connected devices that keep everything running. This is the dashboard for installers and technically minded homeowners who want to monitor the platform itself.
Top badges
The system dashboard shows Settings, the help badge, and recommendations.
System indicators
The System indicators section shows key metrics about the health of the casasmooth platform — processor load, memory usage, and other technical readings.
Software
The Software section shows information about the casasmooth software version and related components.
Wake-on-LAN
The Wake-on-LAN section lets you send wake commands to computers or devices on your network that support this feature.
Battery states
The Battery states section shows the current battery level of all battery-powered devices in the home — sensors, remote controls, and other wireless devices. This is where you check which batteries need replacing. Tapping a battery entry opens the relevant documentation.
Device updates
The Device updates section shows whether any connected devices have firmware updates available.
Entities by unit
The Entities by unit section organises all monitored values by their unit of measurement, giving you a technical overview of everything casasmooth is tracking.
Practical scenarios — system
Routine maintenance check: Once a month you open the system dashboard and check the battery states section. You see that two motion sensors have low batteries and make a note to replace them. You also check the device updates section to see if any firmware updates are available.
---
19
Administration (Admin)
The administration dashboard is where you configure the global settings that affect how casasmooth behaves as a whole — notifications, presence detection, energy costs, and user management. This is the dashboard you visit when setting up casasmooth for the first time or making significant changes to how the system operates.
Top badges
The administration dashboard shows Settings, the help badge, and recommendations.
Welcome
The Welcome section provides an introduction and orientation to the administration dashboard.
Status
The Status section shows the current operational status of casasmooth services.
Notifications
The Notifications section lets you configure how and when casasmooth sends you alerts — for example, which events trigger a notification, and through which channels. This is where you set up SMS alerts or other notification methods so that important events reach you even when you are not looking at the dashboard.
Presence detection
The Presence detection section lets you configure how casasmooth determines whether someone is home. Presence detection influences heating, lighting, and security behaviour across the whole home, so getting this right is important. You can configure which devices or methods are used to detect presence.
Settings
The Settings section provides global configuration options that apply across all dashboards.
Energy costs
The Energy costs section is where you enter the unit cost of electricity (and other energy sources if applicable) for your tariff. These values are used throughout the energy and EV dashboards to calculate accurate cost figures. If your tariff changes, you update it here and all cost calculations across the system will reflect the new rate.
Practical scenarios — administration
Setting up notifications: When you first install casasmooth, you open the administration dashboard and configure notifications so that security alerts are sent to your phone via SMS. You test the notification to confirm it arrives correctly.
Updating energy costs: Your electricity provider changes your tariff at the start of the year. You open the administration dashboard, navigate to the energy costs section, and update the unit cost. From that point on, all energy cost calculations in the energy and EV dashboards use the new rate.
---
20
casasmooth Website
The casasmooth website dashboard embeds the casasmooth product website directly within the interface. This gives you quick access to product documentation, service information, and support resources without leaving the casasmooth environment. You would visit this dashboard when you want to learn more about available services, read the full online manual, or explore what additional capabilities casasmooth offers.
---
21
Panels, Cards, and Settings — A Practical Summary
Throughout casasmooth, the interface uses a consistent set of building blocks that you will encounter in every dashboard.
Panels are collapsible groups of related settings. You open a panel by tapping its toggle tile, adjust the settings inside, and close it when done. This keeps the interface clean while making deep configuration accessible.
Cards are the individual interactive elements within a panel or section. A card might be a toggle tile (on/off), a slider (for a value like brightness or temperature), a status display (showing a current reading), a scene button (to recall a saved lighting scene), or a quick action button (to send an immediate command).
Visibility toggles let you show or hide entire sections or rooms. They affect only what you see on the dashboard — they do not disable any underlying automation or device.
Automation toggles enable or disable the automatic behaviour for a specific domain in a specific room. When you turn off the heating automation for a room, the heating stays at whatever temperature it is currently set to until you adjust it manually.
Scene slots let you save up to four lighting scenes per room and restore any of them instantly. A scene captures the current state of all lights in the room — brightness, colour, and on/off state — so you can recreate it later with a single tap.
Quick actions are immediate commands that bypass the current automation state. Tapping "set lighting to 100%" in the kitchen turns all kitchen lights to full brightness right now, regardless of what the automation would normally do at that time of day.
---